Installation - Positioning of flashings and sarking
The following diagrams illustrate correct positioning of flashings and sarking on timber cladding. Note that in each case the flashing or sarking on timber cladding is positioned between the external cladding and the corner studs.

Weatherboard stops
Each corner join has the cladding butting up to a weatherboard stop, a narrow piece of timber which is used at corners.
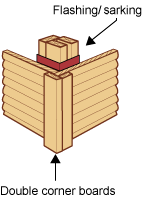
Corner boards
The corner join may be covered by corner boards to protect the cladding join underneath.
Corners without weatherboard stops or boards
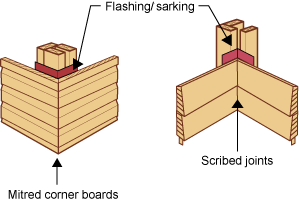
The corner joins show the cladding being cut to match exactly in the corners without additional timber required. The mitred corner is used for an external corner and the scribed joint is used for an internal corner.
Sarking and vapour barriers
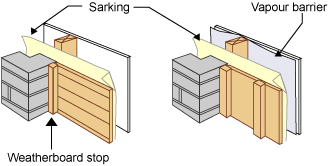 On the exterior side is the cladding and brick piers, then the sarking, on the other side of which are the stud framework and internal lining.